A Laser Cut Acrylic Ring 4 Video Doorbell Mounting Bracket
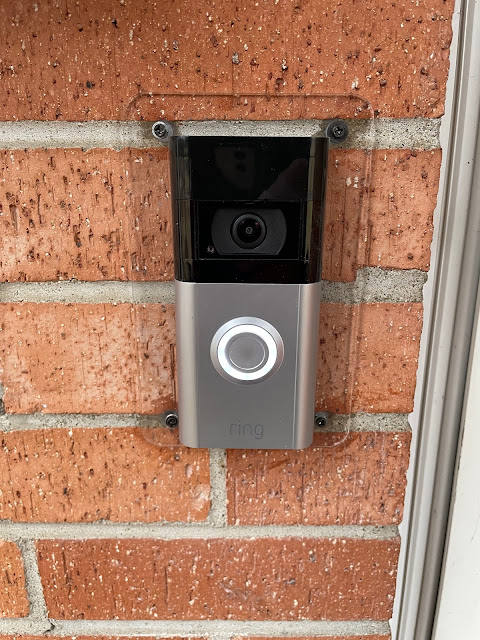 |
| Ring4 video doorbell installed with my laser cut 1/8 inch thick acrylic bracket |
The front of my house is brick and the places where the four holes for mounting happen to fall aren't spaced so all four can go into the mortar. Therefore, I made some measurements of the Ring 4 Doorbell screw holes with calipers, as well as the spacing of the mortar and made a sketch in Fusion 360. The four central holes are for the Ring device and the four outer holes are to attach the bracket into plastic anchors in the mortar. I rounded the corners on the design since it would be undesired to have sharp edges that could poke someone.
 |
| Fusion360 Render of Ring Mounting Bracket |
I then imported the file into LaserWeb and used my K40 laser to cut the design out of 1/8 inch thick plexiglass. I cut it at about 200mm/min with "full strength" intensity and 2 passes to ensure cut through completely. Something I did to save money a few years ago, to have stock on hand for projects such as this, is that I bought a bunch of pieces of scrap offcuts of plexiglass from a local glass company, they sold it to me by the pound, it was far less expensive than buying 'new' pieces of plexiglass anywhere.
Burning plexiglass smells terrible, I have a fan that vents most of the fumes out a window but it doesn't get 100%, doing this project will make my work room stink for a couple of hours.
 |
| Cutting out the bracket as seen through the orange tinted view port on the K40 |
 |
| Cut out Ring 4 acrylic bracket with protective paper peeled off |
 |
| Ring 4 Mounted on Acrylic Bracket with 3mm diameter 10mm long screws. |
I mounted the Ring 4 device to the bracket with some 10mm long 3mm diameter screws and the honbay brand 3mm square nuts I have used in other projects. Next I took some blue painters tape on the area to mount, then used the bracket holes and a fine tipped pen to mark where to drill the holes in the mortar for plastic anchors. I used a masonry drill bit to drill holes, cleaned up the dust, and then used a bit of clear silicone caulking compound to 'glue' the plastic concrete anchors to their holes and left them to sit a few days until I had time to install it, it works. If this bracket were used at another location, it would be important to measure the vertical spacing between the most outward holes and adjust as necessary.
Disclaimer
The author does not make any warranties about the completeness, reliability and accuracy of this information. Any action you take upon the information on this site is strictly at your own risk, and the author will not be held liable for any losses and damages in connection with the use of this information.

This work is licensed under a Creative Commons Attribution-NonCommercial-ShareAlike 4.0 International License.


Comments
Post a Comment